Showing posts with label easy. Show all posts

Saturday, February 4, 2017

Spicy Loaded Chicken Breasts

Spicy Loaded Chicken Breasts = Chicken breast + bacon + cheese topped with banana peppers.

Add your favourite toppings and BOOM you are good to go! 

I love loaded chicken breasts, they are so simple and they leave you feeling so full!

To cut carbs I like to use dry rubs on my chicken breasts for flavour, I then bake them while making the bacon. Once the bacon and chicken breasts are ready I put the oven on broil, place the bacon on the chicken breasts and add shredded cheese to the top. You can garnish the breasts with your favourite toppings, I like to add a little zip with banana peppers but you can also add chopped tomatoes and other toppings to make it your own personalized loaded chicken breast. :) 


Monday, February 23, 2015

Chicken Hugs

My apologies, it has been quite a while. You can catch up on my cross-country move, change in professions, puppy adoption and travels here.


Right now, I've got a creation that was inspired by mean post-workout hunger and very little time. We used 3 chicken breasts, a cup of cheese, 6 slices of ham (you could use any sliced deli meat) and 4 slices of bacon. It made 4 entrees, we each had two and we were very full after!

I'm not sure what to call this; "Chicken Hugs" comes to mind or "Reverse Chicken Cordon-Bleu" (I realise it is a different). Regardless here is what you need to do to make this meaty treat for yourself.

1. Cook yourself up some chicken. I blackened mine a little with some chili pepper spices and hot chipotle salt, but if you want to go a more Italian route you can season with garlic powder and traditional Italian spices.
On a separate ban half cook a piece of bacon for each entree you plan on making. Remove when half cooked.
2. Let your chicken cool after cooking and then rip it up into strips. I was able to use an entire small chicken breast in one of my entrees but it was tiny.
3. Lay out an entire piece of sliced ham on a baking sheet.
4. Lay down a bed of shredded cheese.
5. Lay down a layer of chicken with an inch or so to spare on each side to allow the ham to wrap over top.
6. Sprinkle more cheese on top of the chicken.
7. Wrap the layer of ham over the top of the chicken. As you can see for some of mine I double wrapped using two pieces of ham. Stick a toothpick through all the layers to hold it together.
8. Wrap your half cooked bacon around the ham with the ends coming together at the top.
9. Sprinkle more cheese on top.
10. Place pan in oven and allow to cook until the bacon is crisp and the cheese has melted.
11. Remove from heat and enjoy!


Bam, there you go! My unnamed chicken creation! To simplify the process we stuck out bacon I our George Foreman grill for a quick half cook and used chicken breasts we already had made. We had plenty chicken left over from the 3 breasts to make a salad as well!


Tuesday, June 24, 2014

"Protinis" A Great Snack When You Are In A Pinch!

I was in a pinch on Saturday. I had locked myself out of my office and had a meeting a half an hour after working out, I did not want to leave my protein needs in the hands of the gym staff and pay an arm and a leg for a carby protein shake. I hustled around town to the grocery store where I thought I would find a premixed shakes that are hot right now but Safeway only had cold chocolate milk.

I geared up to by some meat and dig in when I happened to pass by a new product called “Protinis” by Maple Leaf Foods. I was in awe. There are multiple flavours of “Protini” but I have stuck with the Glazed Oven Roasted Chicken & Apple flavor because out of all of the varieties at my local Safeway it is the one with the lowest amount of carbs.

I quickly downed both of the “Protinis” in the package; I was impressed at how good the cold chicken and dried apples were. Nutritionally there are 80 calories in each of the Glazed Oven Roasted Chicken & Apple packs with 5 grams of carb, 1 gram of fibre and 4 grams of sugar. Protein wise they definitely do not measure up to a shake but there are 11 grams of protein in each pack of the Glazed Oven Roasted Chicken & Apple.

They are a little pricey, but nice little treats when you are in a pinch. I plan on packing them for road trips, hikes and any instance when I know I am going to be hard-pressed to find low-carb quick food fixes. I hope gas stations start stocking them!

Here are all of the different flavours of “Protini” on the market right now:
 
From http://www.protinis.ca/en/product.html

Try them out and save a little money with this "Protini" coupon


Sunday, March 9, 2014

Mustard Pork Tenderloin


Mustard Pork Tenderloin

Here is an easy favourite from our kitchen.

It is not pretty and it is not hard. In fact, it is super easy. This is one of the basics we survived off of when we had just started keto.

I hope you like mustard!


Ingredients:
-enough mustard to cover the pork tenderloin completely (3-4 tablespoons)
-one entire pork tenderloin
-salt and pepper to taste

Procedure:
1. Preheat oven to 400 degrees.
2. Line pan with aluminum foil.
3. Coat both sides of the pork tenderloin with mustard.
4. Bake for 20-25 minutes (depending on the size). Do not flip it.
5. Let rest for 5 minutes.
6. Before eating it ensure the centre of the meat is completely cooked.


Nutritional Information (this is for an entire 1lb tenderloin with 4 tablespoons of mustard):
Calories: 707
Fat: 20.4g
Carbs: 3.2g
Sugar: 0.5g
Fibre: 2.0g
Protein: 120.7g

Monday, February 10, 2014

Steak Me Home Tonight: Pan Fried Garlic Butter Steak

We eat a lot of steak, it is one of our favourite dishes to make. Pretty much all of our favourite veg
options go perfectly and a good steak does not need much for seasoning.

One of the big problems we have in our tiny apartment is that we do not have room for a grill or barbecue, our favourite ways to cook steak. We have to pan fry all of our steaks.

This pan-fried garlic butter steak is incredibly quick and easy to make, we have it at least once a week. Sometimes we add a little ghost pepper salt just to spice things up.

The side dish I have pictured with the steak is prosciutto wrapped asparagus, a super easy side. It is perfect for someone who is trying to get into eating more vegetables. 

Ingredients:
-1 steak of your choice
-1 tbsp garlic butter
-season to taste with salt and pepper


Procedure:
1. Heat garlic butter on medium until it has melted and the pan is throughly hot.
2. Season each side to taste and fry on each side for 3 minutes this should give you a medium-rare steak (times may vary depending on stove and how you like steak cooked).
3. Let the steak rest for five minutes and then enjoy!

Nutritional Information:
To Come


Sunday, January 19, 2014

My First Bacon Weave

I am so excited!

I made my first bacon weave yesterday for a recipe I was testing out. My recipe is still in the works, I have been in a breakfast coma all weekend after this recipe, it was amazing.

Bacon weaves are definitely a treat, very high in calories but full of taste. This bacon weave uses 5 slices of thick bacon and 5 slices of maple bacon. We love maple bacon but the only brand our new grocer sells is pretty thin and falls apart. I wanted full on maple flavour, so I used half our crappy (but very tasty) maple bacon and half thick cut bacon.

It worked like a charm. I wish I would have taken a photo of the finished product before I continued on with the recipe... next time!

Ingredients:
10 slices of bacon

Procedure:
1. Preheat oven to 400 degrees.
2. I placed the five slices of maple bacon on the pan horizontally and then weaved in the thick bacon horizontally (over one and then under one).
3. Cook in oven for around 28 minutes.
4. Towel off grease.

Low Carb Ice Cream-Style Floats

I love ice cream floats.


With the Crush rainbow pack of 'diet' pop you can easily make four different types of floats that taste just like ice cream floats without the carbs. This is one of the easiest treats out there to make! With the rainbow pack you can make cream soda, grape, orange or root beer floats.  You can use any diet pop when you make these faux floats.

Ingredients:
1 can of your favourite flavour of diet pop (soda)
1 teaspoon of vanilla
1 teaspoon of coffee cream

Procedure:
1. Empty one or bottle of your favourite pop (soda) into a cup that has about an inch-and-a-half of free space.
2. Pour one teaspoon of vanilla into the pop.
3. Mix in the coffee cream.
4. Enjoy!

Nutritional Information:
Calories: 29
Fat: 1.9g
Carbs: 1.1g
Sugar: 1.0g
Protein: 0.1g

Sunday, December 22, 2013

Dark Chocolate Walnut Cookies

I love these cookies. They are very filling and relatively easy to make. I have experimented with how to deal with the dark chocolate, I tend to like to have the big chunks on top of the cookies to melt over the cookie. Even eating the cookie dough is amazing! 

I will take better pictures the next time I make the cookies, hopefully soon! 


Ingredients:
3 cups of almond flour
1/2 cup of chopped walnuts
1/2 cup of melted unsalted butter
1/2 cup of powdered sweetener (I use splenda or stevia)
1 teaspoon of baking powder
1 teaspoon of Cocoa powder
1/4 teaspoon of salt
2 eggs
1 tablespoon of unsweetened almond milk
4 teaspoons of vanilla
1 90% Cocoa Lindt chocolate bar (you will use most of it)

Procedure:
1. Preheat oven to 350F.
2. Combine salt and powdered sweetener.
3. Whisk eggs and vanilla into the melted butter.
4. Stir in salt and sweetener mixture to the butter mixture.
5. Mix the rest of the dry ingredients together and then add to dry mixture.
6. Chop up the walnuts and dark chocolate bar (I save a few of the squares so that I don't use the entire bar, it is a little much). As you can see I am a little lazy about chopping...
7. Grease the pan with coconut oil.
8. Shape dough into 12 equal sized balls.
9. Bake for 12 minutes (if you have a small oven it may be less).

Nutritional Info (rough numbers on per cookie):
Calories: 296
Total Fat: 27.9g
Carbs: 7.8g
Fiber: 3.8g
Sugars: 1.8g
Protein: 8.3g

Sunday, November 17, 2013

Carbquik Waffles

I really miss super carby breakfasts with crepes, pancakes and waffles. After moving and going through a big transition period where it has been easiest to stick to bacon and eggs we finally got out shit together this morning and made waffles for the first time in months. Boy, were they ever good. 

I don't normally like to post about products that you have to purchase that are hard to find but this morning I am just so happy to have had a special breakfast treat that I have to post about it. Carbquik is expensive, but so worth it to have to make things (easily) that you miss while cutting carbs, like waffles. 


Yum.


The best thing about having a box of Carbquick around the house is how easy it is to make all of the Carbquik recipes. I use the waffle recipe on the back of the box and then add a little bit more vanilla and sugar-free caramel syrup (if I have it). Sometimes we add a scoop of protein powder to the mix too!


Saturday, November 2, 2013

Almond Flour Chicken Strips

We make these bad boys all the time, they are so easy and quick to make. Perfect for after work or a quick lunch. We usually cut up chicken breasts into strips but you can also use pre-cut chicken from your grocer too (this tends to be more expensive). We like them to be a little spicy, so we add a teaspoon of chili powder to the mix, if you are making this for children you may want to nix that part of the recipe. 

When we started making these chicken strips we would give them an egg bath, but we have actually found that it doesn't help breading them and that it is just as easy to dip them in almond flour. 

Ingredients: 
2 Chicken Breasts 
2/3 Cup of Almond Flour
1 Teaspoon of Chili Powder (optional)
Salt & Pepper to Taste

Procedure:
1. Cut chicken into strips or bites, whatever size you would like. 
2. Heat coconut oil in a pan on medium heat.
3. Mix almond flour and seasoning in a medium bowl. 
4. Press both sides of each chicken strip in the dry mixture. 
5. Fry in coconut oil until full cooked inside and golden on the outside. 
These are great with pretty much any dipping sauce! 

Nutritional Information (per serving, makes two servings):
Calories: 355
Fat: 21.7g
Carbs: 8g
Fibre: 4g 
Sugar: 1.3g
Protein: 34.7g  

Monday, October 7, 2013

Low Carb Saganaki

Fried Cheese? Sign me up. 

At first we thought we couldn't make this treat but quickly started to think outside the gluten box and got almond flour involved.

This one is really simple. We have only made it once, I think it will be a common appetizer for our meals from now on. 

We used Krinos frying cheese to make this saganaki. We changed up the traditional recipe a little bit, no flames were involved. The next time we make it we will try using olive oil and let you know how that goes.

Ingredients
-One 110g block of sheep's milk grilling cheese
-1/2 cup of almond meal/flour 
-1/4 cup of butter for frying
-1 tsp. of chili pepper
-1 xl egg
-a dash of salt & pepper

Procedure
1. Add all of your dry ingredients in a bowl.
2. Crack an XL egg and whip it in a small bowl.
3. Dip the block of cheese in the egg.
4. Heat butter on high in pan.
5. Coat your dipped block of cheese in flour and seasoning mixture.
6. Fry until golden brown on both sides. 


Nutritional Information per Serving (makes 4 servings):
Calories: 202.5
Fat: 16.75g
Carbs: 4.1g
Fibre: 1.5g
Sugar: 0.6g
Protein: 12.57g

Sunday, September 8, 2013

A New Take On Pulled Pork


Usually I make pulled pork with a barbecue sauce for flavour but I wanted to switch it up a little bit this week when I made my batch of pulled pork.

In my house we use pulled pork for everything. It is amazing low carb treat to have around, you can use it for anything. I add it to my omelettes, on top of my keto pizzas, for a treat I even make a yam fries pulled pork poutine (this is a cheat day homemade recipe that is not crazy in carbs but perfect for reloading).

Here is my new pulled pork recipe. It is a little different, but the procedure is pretty much the same. The only thing that is different is that you add all of the sauces while you cook it, after the eight hours slow cooking it is done!

I don't like to blog recipes that involve using Frankenfood syrups (because not everyone can swing by their local supermarkets and find them), but this pulled pork was too good not to share.

Ingredients:
-1.5-2 kg of pork shoulder
-2 Tablespoons of yellow mustard
-1/4 Cup of sodium soy sauce (I did not bother with low sodium, I used the lowest carb one I could find)
-2-3 Tablespoons of maple syrup (again use the lowest carb one you can find, I used Walden Farms Pancake Syrup)
-2 Tablespoons of olive oil (next time I am going to try coconut oil)
-2 Tablespoons of hot sauce
-2 Teaspoons of garlic powder or salt
-2 Tablespoons of water
-A dash of salt and pepper

Procedure:
1. Place meat in slow cooker.
2. Add all liquids except water to the slow cooker over the meat.
3. Add all spices to the meat.
4. Add water over the meat.
5. Slosh the meat around in the sauce.
6. Cook on low heat for 8 hours, stir and stab the meat every couple of hours.

Nutritional Information (makes about 8 servings with 1.5kg of meat)
Calories: 246
Fat: 12.6g
Carbohydrates: 0.6g
Fiber: 0.1g
Sugar: 0.5g
Protein: 31.05g

Tuesday, September 3, 2013

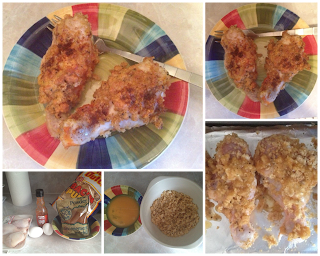
Super Simple Pork Rind Crispy Chicken Drumsticks

I like to make these chicken drumsticks as a snack, like jumbo chicken wings.  I like them to be spicy, but you can easily season them differently (salt & pepper or honey garlic for example).


Ingredients
200g of crushed up pork rinds
4 chicken drumsticks
1 egg
2 tsps of hot sauce
seasoning (to taste)
a dash of salt and pepper.


Procedure:
1. Preheat oven to 375 degrees, grease aluminum foil on a pan (I use coconut oil).
2. Crush up pork rinds. I like to use a spoon to crush them in a medium bowl.
3. Add dry seasonings (except salt) to pork rinds.
4. Crack egg in a separate bowl.
5. Add 1/2 tsp of hot sauce to the egg mixture (optional).
6. Add a dash of salt to the eggs mixture.
7. Let the chicken drumsticks sit in the egg mixture for about 5 minutes.
8. Roll chicken drumsticks in the crushed up pork rinds. Try to coat as much of the drumstick as possible. This will depend on how crushed the pork rinds are.
9. After you coat the entire drumstick place it on foil and bake for 15 minutes.
10. Remove from oven and flip. Spoon hot sauce over the drumstick.
11. Bake for 15 more minutes.
12. Remove from heat. Spoon more hot sauce onto the chicken (to taste).
13. Wrap foil over chicken until you are ready to serve.

Nutritional info to come...

Sunday, August 4, 2013

Cheese Stuffed Pork Chops

Pork chops and pork tenderloin are a staple in our diet. They are a cheap alternative to chicken and beef. We are poor new grads so saving a few bucks on meals is huge, I imagine this would be a perfect meal for a family. For $7 we bought 5 pork chops.

Ingredients
-Pork chops (I used 5)
-2 tsp of Mrs. Dash Garlic and Herb (you can also mix your own blend of herbs and garlic)
-a dash of salt and pepper
-1/2 tsp. of chili peppers
-coconut oil
-1 tsp. of hot sauce
-100-200g of your favourite cheese (we used marble)

The pork chops I used were rather thin, it was impossible to find thick cut chops at our grocer. If you can, use thick cut pork chops.

Procedure
1. Preheat oven to 350. And spread enough coconut oil over aluminum foil on pan for each pork chop.
2. Slice cheese into strips.
3. Make a length-wise slit in each pork chop that will fit your cheese. Do not cut down the entire length.
4. Stuff each pork chop with cheese.
5. Tooth pick the pork chop shut.
6. Add all of the dry ingredients together in a bowl.
7. Add hot sauce to the dry ingredients.
8. Dip each side of each pork chop in the spices in the bowl.
9. Bake the pork chops for 20 minutes.
10. Remove pork chops from oven and each one over. If cheese is leaking out you can try to put it back into the pork chops (or on top of them).
11. Bake for 10 to 15 minutes.

Nutritional Information
(to come)

Saturday, August 3, 2013

Spicy Jalapeño Butter Shrimp


We love to switch up our seafood mid-week. 'Spicy Jalapeño Butter Shrimp' is one of our favourite ways to prepare shrimp, it is SO quick and SO easy. Perfect to make when you get home from work in a hurry to eat. We have started throwing jalapeños into the pan when we make the shrimp, but they are optional.
We often use the shrimp as a side with other things like Flatout Mini Pizzas. 
Ingredients:
-1lb Bag of Shrimp
-1/4 cup of butter
-1/2 can of Jalapeños (optional)
-salt & pepper to taste
-1 tsp. chili flakes
-1-2 tsp. chili powder
-1 tbsp. coconut oil
*season to taste, if these seasonings are too much for you reduce them

Procedure
1. Thaw shrimp (if frozen).
2. Heat coconut oil in pan on stovetop at medium heat.
3. Add butter to the coconut oil.
4. Add thawed shrimp to the pan.
5. Add seasoning to the shrimp and butter.
6. Cook shrimp for 5-10 minutes (this may vary by stove/will be different if you are using precooked shrimp).
7. Add jalapeños (optional). Let sit for 2-5 minutes. 

Nutritional Information: 
(to come)


Thursday, June 13, 2013

Pork Rind Breaded Chicken Bites

We made these amazing pork rind chicken bites on a night when we had run a little tired of our normal
grilled chicken breasts.

They are super easy and you can vary the recipe by using different sauces.

For this batch we used Guy's BBQ Sauce (0 carb) and cut it with hot sauce.

We wanted hot bites, if you are making 'salt and pepper' bite or garlic bites you may not want to spice the egge mixture with cayenne pepper and chili flakes.

Ingredients
1 Egg
1/2 Teaspoon of Cayenne Pepper
1/2 Teaspoon of Chili Flakes
2 Chicken Breasts
A Dash of Salt and Pepper
1/2 Bag of Pork Rinds
2 Tablespoons of Coconut Oil

Procedure
1. In a small bowl mix together salt, pepper, egg and spices.
2. In another small crush up half a bag of pork rinds for breading the chicken breasts.
3. Cut chicken breasts into bite sized portions or strips.
4. Heat one tablespoon of coconut oil at medium heat in pan.
5. Dip chicken in egg mixture.
6. Coat chicken with crushed pork rinds.
7. We make them in two batches, frying half the bites at a time. Fry for about five minutes. Flip and fry for an additional 2 minutes.
8. Plate the bites and then spoon sauce over the bites.


You may not want to use sauce at all for coating the chicken bites. You can alternatively just use a dipping sauce.

Nutritional Information 
(will be updated soon)

Tuesday, June 11, 2013

Faux Apple Pie

This is a little different than anything I have ever posted before.

I am a MASSIVE apple fan, it is my weakness whenever we go out for supper and I see an apple dessert on the menu I falter.

Not anymore. This is not the best thing for your diet, but its a heck of a lot better than jumping the wagon completely.

This is a tad different than anything I have ever posted before because it's not really a recipe, it is my guilty pleasure.

I never post anything using sugar-free flavour syrups, this is different. This is the quick and easy version of this treat. You can cut a few carbs out of the whip topping by making whip cream yourself. But, this is what I have been doing because my schedule is so busy.

Seriously, this takes about 5 minutes to throw together and will save you countless carbs if you are like me and love apple (or any dessert). You can do this with pretty much any Questbar, just treat them like pie!


Ingredients
1 Apple Pie QuestBar
2 Tablespoons of Whip Cream
1 Pump of Sugar Free Caramel Syrup

Procedure
1. Warm your QuestBar in the microwave for around 30 seconds.
2. Mix one pump of caramel syrup with whipped topping (if you are using genuine whipped cream or ice cream you may not need to do this).
3. Scoop two tablespoons of whipped topping onto QuestBar.

Nutritional Information per full dessert
Calories 192.5
Fat 6.5g
Total Carb  26.5g
Dietary Fibre 18g
Sugar 4.5g
Protein 20.1g


Monday, June 3, 2013

Beer Can Chicken

Beer can chicken is a favourite in my household.

Seriously, when all else fails there is 'Beer Can Chicken'.

The best park about it is how much it meat it makes, it is perfect for a supper for two or gour (depending on the size of your chicken) and you will most likely have left overs the put in your salad the next day.

We typically feed four adults with one beer can chicken and have enough leftovers to cut up for a salad the next day!

This recipe is pretty versatile too, you can spice the chicken to enhance different flavours. We use chicken rubs to spice it up a bit, but in this posting I will stick to the basics for a great low-carb/high-fibre 'Beer Can Chicken'.

We have started making this classic in our new smoker, but you can also make your 'Drunken Chicken' in the oven or on the barbecue. We prefer the barbecue, it is such a great summer dish!


Ingredients
1 Chicken (aim for a 4-5 pounder)
2 Tablespoons of liquified (heated) coconut oil
2 Tablespoons of salt
*3 Tablespoons of your favourite spices (I like a mixture of paprika, thyme, cayenne peppers, garlic powder, chillies and a dash of cinnamon) or use your favourite rub
1 Teaspoon of black pepper
1 Can of low carb beer (I use canned Michelob Ultra)

Procedure
1. Heat your BBQ to medium-high or your oven to 350F. If you are using gas try to use only half of your burners. If you are using coals that you move the chicken to an area free of coals.
2. Mix together your spices in a small bowl.
3. Remove and discard the chicken's neck and giblets.
4. Rinse the chicken inside and out.
5. Pat the chicken dry with paper towel, inside and outside.
6. Coat your chicken with coconut oil, inside and out.
7. Give your chicken a good rub with salt, your spices/rub and pepper. Again, both inside and out.
8. Empty half of your beer.
9. Insert your beer can into your chicken. This is easiest if you have one of the devices pictured below, but if you dont you can place your beer can on a counter and then thrust your chicken into it.
10. Place your bird in the center of your BBQ or oven and let cook for about 1 hour and 15 minutes. Keep your chicken away from direct heat.
11. Let sit for 5-10 minutes before serving.

Keep an eye on your chicken and make sure you test the temperature in the breast and thighs before serving.


You can buy the beer can chicken holder here:
http://www.kitchenniche.ca/beer-can-chicken-roaster-p-1061.html


Tuesday, May 28, 2013

Fried Pepperoni, The Easiest Night-In Snack

I used to hate pepperoni, now I love it.

Its greasy greatness, the perfect treat if you are staying in and want a quick snack.

Ingredients
-100g of your favourite pepperoni (I used cheddar pep in my photos)
-coconut oil
-sour cream, salsa, mustard or ranch for dip

Procedure
1. Cut up your desired amount of pepperoni into thick (or thin) rounds.
2. Heat coconut oil at a medium-high on stove top.
3. Fry pepperoni until crisp.
4. Place pepperoni on paper towel and let sit for a couple minutes to allow grease to run off.
5. Serve with selected dip.


Nutritional Information (per 100g)*
Calories: 493
Total Fat: 43.0g
Total Carbs: 0g
Protein: 21.9g

*This is approximate, different brands and makes of pepperoni may have different nutritional values.